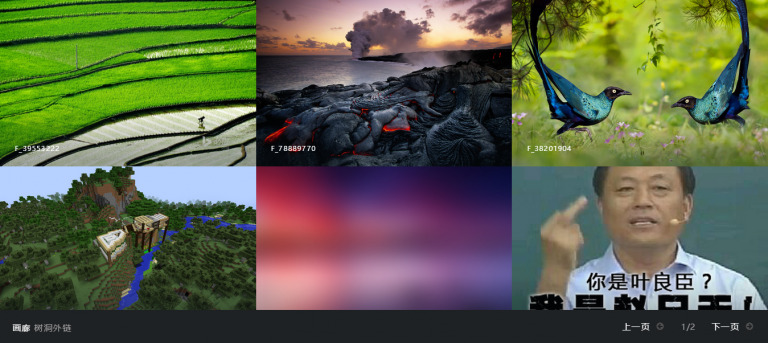
注:画廊页面将会列出所有用户上传的文件,不管是不是公开。所以本页面并不适用于一些私密性图床。
1.下载
下载地址:此处为隐藏内容,请评论后查看隐藏内容,谢谢!
下载后解压到主题目录下的pages目录下,以material为例,把所有文件解压到/content/themes/material/pages/下。如果你的主题没有该目录,请新建一个。
2.配置
树洞外链的每一个自定义页面都要在config.json中注册。打开pages目录下的config.json文件(没有请新建一个)。以material主题为例,内容如下:
[
    {
        "id": "explore",
        "file": "shares"
    },{
        "id": "exsplore",
        "file": "shares"
    },{
        "id": "exsddplore",
        "file": "shares"
    },{
        "id": "exsdddplore",
        "file": "shares"
    }
]
3这里共注册了4个页面,第一个就是“文件广场”,标示为explore,页面文件为shares.php,访问该页面时程序会引入pages目录下的shares.php文件。其他四个是测试时留下的。我们在后面添加一项,id为gallery,页面文件名为gallery。如下:
[
    {
        "id": "explore",
        "file": "shares"
    },{
        "id": "exsplore",
        "file": "shares"
    },{
        "id": "exsddplore",
        "file": "shares"
    },{
        "id": "exsdddplore",
        "file": "shares"
    },{
        "id": "gallery",
        "file": "gallery"
    }
]
保存后访问http://您的域名/views/pages.php?id=gallery,测试能否正常显示。
3.修改
我们要在导航条上添加一个链接指向这个页面。以material为例。打开模板目录下的head.html,在导航条上添加:
<li><a href="~$zzurl~~views/pages.php?id=gallery"><i class="fa fa-photo" aria-hidden="true"></i> 画廊</a></li>

 支付宝打赏
支付宝打赏  微信打赏
微信打赏
评论